How to Cook on a Blackstone Griddle
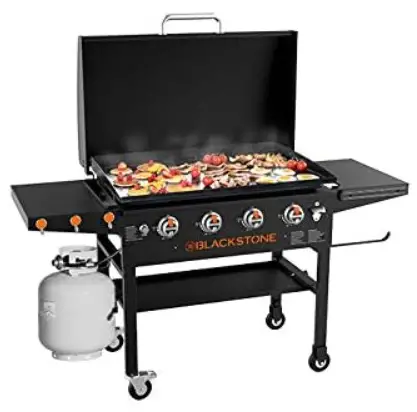
Are you tired of the same old cooking routine and looking to spice up your outdoor culinary adventures? The new Blackstone griddle is here to revolutionize your cooking experience and take it to the next level.
Cooking on a Blackstone griddle offers unparalleled versatility that will leave you amazed. Whether you’re whipping up a hearty breakfast, sizzling juicy burgers, or stir-frying fresh vegetables, this incredible piece of equipment can do it all. Say goodbye to multiple pans and hello to the convenience of one spacious cooking surface.
Blackstone griddles have gained immense popularity among outdoor cooking enthusiasts for a reason. Their durable construction, efficient heat distribution, and easy-to-use design make them a top choice for backyard barbecues, camping trips, tailgating parties, and more. With different sizes and models available, there’s a Blackstone griddle perfectly suited for your needs.
So why wait? Get ready to unleash your inner chef and elevate your outdoor cooking game with the new Blackstone griddle. Let’s dive into the world of delicious possibilities!
Traeger Flatrock vs Blackstone: Ultimate Griddle Showdown 2023
3 Best Blackstone Flat Top Grill 2023 – Best Reviews
7 Best Blackstone Indoor Grills 2023: Top Options
Essential Tools and Accessories for Blackstone Griddle Cooking
Must-have tools for efficient cooking on a Blackstone griddle
Having the right tools is essential for efficiency and convenience. Here are some must-have tools that will make your cooking experience a breeze:
- Spatulas: A good quality spatula is crucial for flipping burgers, pancakes, and other delicate foods without damaging them or scratching the griddle surface. Look for spatulas with long handles and sturdy construction.
- Tongs: Tongs are versatile tools that allow you to easily handle larger pieces of meat, vegetables, or seafood on the griddle. Opt for tongs with non-slip grips and heat-resistant materials.
- Grill scraper: Cleaning your griddle after each use is important to maintain its cooking surface. A grill scraper with a sharp edge will help you remove any food residue or grease effortlessly.
- Oil dispenser: Controlling the amount of oil you use while cooking is crucial for achieving the perfect flavor and texture. An oil dispenser with a spout will ensure precise pouring without any mess.
- Meat thermometer: To ensure your meats are cooked to perfection, invest in a reliable meat thermometer. This tool will help you monitor the internal temperature of your food accurately.
Enhancing your cooking experience with useful accessories
In addition to essential tools, there are various accessories available that can enhance your Blackstone griddle cooking experience:
- Griddle cover: Protecting your griddle from dust, dirt, and harsh weather conditions is important to prolong its lifespan. A griddle cover specifically designed for Blackstone models will keep it in top-notch condition.
- Side shelf: Adding a side shelf to your griddle provides extra workspace where you can place ingredients, utensils, or even finished dishes while cooking.
- Griddle hood: A griddle hood acts as a lid, trapping heat and smoke to create an oven-like environment on your griddle. This accessory is perfect for baking, roasting, or smoking food.
- Drip tray liners: Cleaning up grease and food drippings can be messy and time-consuming. Using drip tray liners can make the cleaning process much easier by simply discarding the liner after use.
Safety equipment to consider when using a Blackstone griddle
While cooking on a Blackstone griddle is enjoyable, it’s important to prioritize safety. Here are some safety equipment options you should consider:
- Heat-resistant gloves: Protecting your hands from burns is crucial when working with hot surfaces. Heat-resistant gloves will provide the necessary insulation while allowing you to handle food comfortably.
- Apron: An apron not only keeps your clothes clean but also protects you from any splatters or spills that may occur during cooking.
- Fire extinguisher: Accidents happen, and having a fire extinguisher nearby can help prevent small fires from turning into disasters. Make sure you have a fire extinguisher rated for grease fires in your kitchen area.
By equipping yourself with these essential tools and accessories, you’ll be well-prepared to cook delicious meals on your Blackstone griddle while ensuring efficiency, convenience, and most importantly, safety.
Seasoning and Preparing Your Blackstone Griddle
Seasoning your new Blackstone griddle is an essential step to ensure optimal cooking performance and prolong the lifespan of your cooking surface. By properly seasoning your griddle, you create a protective layer that prevents rust, enhances non-stick properties, and imparts a unique flavor to your food.
To begin the process of griddle seasoning, follow these simple steps:
- Clean the Surface: Before seasoning, it is crucial to clean any debris or manufacturing residue from the griddle surface. Use warm soapy water and a sponge to scrub away any dirt or grease. Rinse thoroughly and dry completely.
- Apply Oil: Once the griddle is clean and dry, apply a thin layer of oil evenly across the entire cooking surface. You can use vegetable oil, flaxseed oil, or any high-smoke-point oil suitable for seasoning.
- Heat Gradually: Turn on the heat source beneath the griddle to medium-high heat. Allow it to gradually heat up until you see light smoke rising from the surface. This process helps open up pores in the metal for better absorption of oil.
- Spread Oil Evenly: Using tongs or a folded paper towel soaked in oil, spread it evenly across the hot griddle surface. Be careful not to burn yourself as you work swiftly to coat every inch of the cooking area.
- Repeat Layers: Repeat this process several times, applying thin layers of oil and allowing them to cook into the metal before adding another layer. The more layers you build up during seasoning, the better protected and seasoned your griddle will be.
Once your Blackstone griddle is seasoned, it’s important to maintain its condition for long-lasting performance:
- Cleaning Routine: After each use, scrape off any food residue with a spatula while keeping the griddle hot. Then wipe down with a damp cloth or paper towel. Avoid using soap, as it can strip away the seasoning.
- Oil After Cleaning: Once the griddle is clean and dry, apply a thin layer of oil to maintain its seasoned surface. This will help prevent rust and keep your griddle in top shape for future cooking sessions.
- Avoid Harsh Cleaners: When cleaning your seasoned griddle, avoid using abrasive cleaners or scouring pads that can damage the seasoning. Stick to gentle cleaning methods to preserve the non-stick properties.
By following these steps and maintaining a regular cleaning routine, you’ll ensure that your Blackstone griddle remains in excellent condition for years to come. So get ready to cook up delicious meals with ease on your perfectly seasoned cooking surface!
Achieving Perfect Heat Control on Your Blackstone Griddle
Understanding the heat zones on a Blackstone griddle
Understanding the heat zones is crucial for achieving perfect results. The griddle surface is divided into different temperature zones, allowing you to cook multiple items simultaneously without having them interfere with each other’s cooking process.
The first thing you need to know is that the center of the griddle tends to be hotter than the outer edges. This means that if you’re looking for high heat, such as when searing a steak or stir-frying vegetables, the center zone is where you should place your ingredients. On the other hand, if you want gentler heat for foods that require slower cooking or warming up, like pancakes or keeping food warm, the outer edges are your go-to zones.
Keep in mind that these temperature differences may vary depending on factors such as wind conditions and ambient temperature. It’s always a good idea to experiment and adjust accordingly until you find what works best for your specific setup.
Controlling temperature with the adjustable burners of a Blackstone griddle
To achieve precise control over the temperature of your Blackstone griddle, take advantage of its adjustable burners. Each burner can be individually controlled using dedicated knobs, allowing you to fine-tune the heat according to your cooking needs.
Start by preheating your griddle with all burners set to high. Once it reaches your desired initial temperature, begin adjusting each burner based on how much heat you need in each zone. For example, if you want higher temperatures in the center and lower temperatures towards the edges, turn down the burners closest to the center while leaving those near the edges at a higher setting.
Remember that these adjustments may require some trial and error before finding what works best for your specific recipe or cooking style. Don’t be afraid to experiment and make note of the settings that yield the best results, so you can replicate them in future cooking sessions.
Tips for achieving even heat distribution across the cooking surface
Achieving even heat distribution across the entire flat cooking surface of your Blackstone griddle is essential for consistent and uniform cooking. Here are some tips to help you achieve this:
- Preheat properly: Allow your griddle to preheat for at least 10-15 minutes before placing any food on it. This ensures that the entire surface reaches an even temperature.
- Spread oil evenly: Before cooking, spread a thin layer of oil across the griddle surface using a brush or paper towel. This helps prevent hotspots and promotes better heat transfer.
- Use multiple burners: If your griddle has multiple burners, use them strategically to distribute heat more evenly. For example, if you’re cooking a large batch of food, turn on additional burners to cover more surface area.
- Rotate and shift ingredients: As you cook, periodically rotate and shift your ingredients around different zones of the griddle to ensure they receive equal exposure to heat.
By following these tips and understanding how to control the heat zones on your Blackstone griddle, you’ll be well-equipped to cook delicious meals with precise temperature control and even heat distribution across the entire cooking surface. Experimentation and practice will ultimately lead you to master this versatile outdoor cooking tool!
Flipping and Handling Food Like a Pro
Cooking on a Blackstone griddle can be an exciting and rewarding experience. To truly master the art of cooking on this versatile flat top, it’s essential to learn how to flip and handle food like a pro.
Techniques for flipping food without sticking or breaking it apart
Flipping food without it sticking or falling apart is crucial for achieving perfectly cooked meals. One effective technique is to ensure your griddle surface is adequately seasoned with oil or butter before cooking. This creates a non-stick surface that allows you to effortlessly flip foods like burgers, chicken wings, or even delicate fish fillets.
Using two spatulas can provide better control and prevent them from breaking apart. Gently slide one spatula under the food while simultaneously using the second spatula on top to support and flip it over. This method ensures even distribution of pressure and reduces the risk of mishaps.
Proper use of spatulas, tongs, and other utensils on a hot griddle surface
Choosing the right utensils for handling food on a hot griddle is essential for both safety and optimal cooking results. Spatulas with long handles are ideal for maneuvering around the large cooking area of your Blackstone griddle without getting too close to the heat source.
Tongs are another indispensable tool when working with meats or other foods that require precise handling. Their grip allows you to turn items effortlessly while maintaining their shape and juiciness. Whether you’re searing steaks or flipping bacon strips, tongs offer excellent control over your ingredients.
Remember to use caution when using any utensil on the hot surface; always wear protective gloves if necessary, as safety should never be compromised while cooking.
Mastering the art of searing, caramelizing, and achieving perfect grill marks
One of the advantages of cooking on a Blackstone griddle is the ability to achieve restaurant-quality sears, caramelization, and those coveted grill marks. To achieve that mouthwatering crust on your meats or vegetables, follow these tips:
- Preheat your griddle to ensure it reaches the desired temperature before adding food.
- Use high heat settings and allow sufficient time for the griddle surface to become hot.
- Apply a thin layer of oil or butter to enhance flavor and aid in browning.
- Place your ingredients on the griddle surface without overcrowding to allow proper heat circulation.
- Avoid moving or flipping food too frequently; let it develop a beautiful sear before turning.
- Rotate items 45 degrees during cooking to create appealing crosshatch grill marks.
By mastering these techniques, you’ll be able to impress your family and friends with perfectly seared steaks, caramelized onions, and beautifully marked chicken breasts.
Beginner-Friendly Recipes for Blackstone Griddle Cooking
Quick and Easy Breakfast Recipes to Try on Your Blackstone Griddle
Rise and shine! If you’re looking to kickstart your day with a delicious breakfast cooked on your trusty Blackstone griddle, we’ve got you covered. The beauty of cooking breakfast on a griddle is that it allows you to prepare multiple items simultaneously, ensuring a hearty and satisfying meal in no time. Here are some mouthwatering breakfast ideas to try:
- Classic American Breakfast: Whip up a traditional feast by cooking bacon, eggs, and pancakes all at once on your griddle. The sizzling sound of bacon hitting the hot surface will awaken your taste buds, while perfectly cooked sunny-side-up eggs and fluffy pancakes complete the ensemble.
- Breakfast Burritos: Create a portable morning delight by sautéing onions, bell peppers, and scrambled eggs together on your griddle. Add some crispy bacon or sausage for an extra burst of flavor. Wrap it all up in warm tortillas with cheese and salsa for a grab-and-go breakfast option.
- French Toast: Dip thick slices of bread into a mixture of beaten eggs, milk, cinnamon, and vanilla extract before placing them onto the preheated griddle. Watch as they turn golden brown and develop a delightful crispness around the edges.
Delicious Lunch Ideas That Can Be Cooked in No Time on a Hot Griddle Surface
When hunger strikes at noon, there’s nothing better than firing up your Blackstone griddle for some quick and tasty lunch options. Whether you’re craving something light or filling, these recipes will hit the spot:
- Gourmet Burgers: Elevate your burger game by using your griddle to cook juicy patties with perfectly caramelized edges. Experiment with different toppings like melted cheese, sautéed mushrooms, or crispy bacon to create your ultimate burger masterpiece.
- Stir-Fry Delight: Heat up your griddle and stir-fry a medley of fresh vegetables, thinly sliced meat, and aromatic sauces. The high heat of the griddle ensures that everything cooks quickly while retaining its vibrant colors and crisp textures.
- Quesadillas: Crispy tortillas filled with gooey cheese and your favorite ingredients make for a delightful lunch option. Add some grilled chicken, sautéed veggies, or even leftover pulled pork to take your quesadillas to the next level.
Mouthwatering Dinner Recipes That Showcase the Versatility of a Blackstone Grill
As the day winds down, it’s time to unleash the full potential of your Blackstone griddle with some delectable dinner recipes. From succulent steaks to sizzling seafood, these dishes will impress even the most discerning taste buds:
- Steakhouse Experience: Achieve restaurant-quality steaks by searing them on your griddle at high heat. The intense sear locks in juices, creating a tender and flavorful piece of meat that will leave you wanting more.
- Seafood Feast: Grilled shrimp, scallops, or fish fillets are elevated to new heights when cooked on a hot griddle surface. Enhance their natural flavors with a sprinkle of seasoning or a squeeze of lemon juice for an unforgettable dining experience.
- Gourmet Burgers: Create juicy and flavorful burgers with the Blackstone grill, perfect for a casual yet delicious dinner option.
- Grilled Vegetables: Elevate your vegetable game by grilling them on the Blackstone griddle, adding a smoky and charred flavor to your favorite veggies.
- Asian Stir-Fry: Whip up a quick and flavorful stir-fry using the high heat and even cooking surface of the Blackstone grill.
- Breakfast for Dinner: Enjoy breakfast classics like pancakes, bacon, and eggs on the versatile Blackstone griddle for a fun twist on dinner.
- Fajita Fiesta: Sizzle up tender and flavorful fajitas with perfectly grilled meat and vegetables, adding a touch of Tex-Mex flair to your dinner table.
Cleaning and Maintaining Your Blackstone Griddle
Step-by-step guide to cleaning your black stone grill after each use
Cleaning your Blackstone griddle after each use is essential for maintaining its performance and prolonging its lifespan. Follow these simple steps to ensure a thorough clean:
- Heat up the griddle: Turn on the burners and let the griddle heat up for a few minutes. This will help loosen any stuck-on food particles.
- Scrape off debris: Using a metal spatula or scraper, gently scrape off any food residue or grease from the surface of the griddle. Be careful not to scratch the surface.
- Wipe with oil: Once all debris is removed, pour a small amount of cooking oil onto a paper towel or cloth and rub it onto the griddle’s surface. This helps prevent rust and keeps the griddle seasoned.
- Clean with water and mild soap: Mix warm water with mild dish soap in a bucket or sink. Use a non-abrasive sponge or cloth to scrub the entire surface of the griddle, removing any remaining grease or stains.
- Rinse thoroughly: Rinse off all soap residue using clean water, ensuring no soapy film remains on the griddle’s surface.
- Dry completely: Use a dry cloth or paper towels to wipe down the griddle until it is completely dry. Moisture can lead to rust, so make sure every part of the griddle is dry before storing it.
Tips for preventing rust and prolonging the lifespan of your black stone grill
Preventing rust on your Blackstone griddle is crucial in maintaining its quality over time. Here are some tips to help you keep your grill in top shape:
- After each use, apply a thin layer of cooking oil on both sides of your griddle.
- Store your Blackstone grill in a dry area with proper ventilation to prevent moisture buildup.
- Cover your griddle with a weather-resistant cover when not in use, especially during the off-season or extended periods of non-use.
- Regularly inspect your griddle for any signs of rust or damage. If you notice rust spots, clean and re-season the affected areas immediately.
- Avoid using harsh chemicals or abrasive cleaning tools that can damage the griddle’s surface.
How to store your black stone grill during off-seasons or extended periods of non-use
Proper storage is key to maintaining its condition. Follow these steps:
- Clean the griddle: Before storing, make sure to thoroughly clean and dry the griddle following the step-by-step guide mentioned earlier.
- Disconnect propane tank: If your Blackstone griddle uses a propane tank, disconnect it from the grill before storing. Ensure there are no leaks and store the tank in a well-ventilated area away from heat sources.
- Remove grease tray: Take out the grease tray and empty any leftover grease or debris. Clean it separately before returning it to its place.
- Cover and protect: Use a weather-resistant cover specifically designed for Blackstone griddles to protect it from dust, dirt, and moisture during storage.
Mastering the Art of Blackstone Griddle Cooking
Congratulations! You’ve now learned the essential tools and accessories, how to season and prepare your Blackstone griddle, achieve perfect heat control, flip and handle food like a pro, and even tried out some beginner-friendly recipes. You’re well on your way to becoming a master of Blackstone griddle cooking!
But don’t stop here – keep experimenting with new recipes, flavors, and techniques. The possibilities are endless on your Blackstone griddle. Whether you’re hosting a backyard barbecue or whipping up a quick weeknight dinner, this versatile cooking tool will continue to impress you with its delicious results.
So go ahead, fire up that griddle and let your culinary creativity shine. Remember to share your mouthwatering creations with friends and family – they’ll be blown away by your newfound skills. Happy cooking!
FAQs
Can I use my Blackstone griddle indoors?
Yes, you can use your Blackstone griddle indoors as long as it is in a well-ventilated area. Make sure to follow all safety guidelines provided by the manufacturer.
How do I clean my Blackstone griddle?
To clean your Blackstone griddle, scrape off any excess food debris using a metal spatula. Then wipe down the surface with a cloth or paper towel soaked in water or mild dish soap. Avoid using abrasive cleaners that may damage the surface.
Can I cook breakfast foods on my Blackstone griddle?
Absolutely! One of the great things about the Blackstone griddle is its versatility. It’s perfect for cooking breakfast favorites like pancakes, bacon, eggs, and even hash browns.
How do I prevent food from sticking to the griddle?
To prevent food from sticking to the griddle, make sure it is properly seasoned before each use. Preheat the griddle before adding any ingredients and use enough oil or butter to create a non-stick surface.
Can I use my Blackstone griddle for camping trips?
Yes, the Blackstone griddle is portable and can be used for camping trips. Just make sure you have access to a propane tank or other fuel source, and follow all safety precautions while using it in an outdoor setting.
0 Comments