How Long to Cook Chicken Breast at 350?
Are you wondering how long to cook chicken breast at 350 degrees Fahrenheit? Look no further! Cooking chicken breast at 350°F is a popular and reliable method that ensures juicy and flavorful results. In fact, 350°F is equivalent to 175°C, which is the ideal temperature for cooking chicken breast in an oven.
To achieve perfectly cooked chicken breast, it’s important to cook it to an internal temperature of 165°F. However, cooking time varies depending on the thickness of the chicken breast. Using a meat thermometer is the most accurate way to determine doneness and avoid undercooked or overcooked chicken.
So why should you bake chicken breast at 350? This temperature allows for even cooking without drying out the meat. Plus, it’s a convenient and easy method that can be used for various recipes.
Let’s get started!
Best Oven-Baked Chicken Breast Recipes
If you’re looking for an easy, healthy, and delicious meal idea, baked chicken breast is a great option. Not only is it quick and simple to make, but it’s also a versatile ingredient that can be paired with a variety of sides.
Easy Baked Chicken Breast Recipe for Beginners
If you’re new to cooking or just looking for a simple recipe that doesn’t require too much prep work, this easy baked chicken breast recipe is perfect. Here’s what you’ll need:
- 4 boneless chicken breasts
- 1 tablespoon olive oil
- Salt and pepper
- Garlic powder
- Paprika
Instructions:
- Preheat your oven to 350°F.
- Place the chicken breasts in a baking dish.
- Drizzle the olive oil over the chicken breasts.
- Season with salt, pepper, garlic powder, and paprika.
- Bake for 25-30 minutes or until the internal temperature reaches 165°F.
This recipe is great on its own or can be served with roasted vegetables or a side salad.
Juicy and Tender Baked Boneless Chicken Breasts
Boneless chicken breasts can sometimes turn out dry if not cooked properly. But with this recipe, you’ll get juicy and tender chicken every time.
Here’s what you’ll need:
- 4 boneless chicken breasts
- Salt and pepper
- Olive oil or butter
Instructions:
- Preheat your oven to 350°F.
- Season the chicken breasts with salt and pepper.
- Heat some olive oil or butter in an oven-safe skillet over medium-high heat.
- Add the chicken breasts to the skillet and cook for about 3 minutes per side until browned.
- Transfer the skillet to the oven and bake for 15-20 minutes or until the internal temperature reaches 165°F.
This recipe is perfect for a quick weeknight meal and can be paired with rice, quinoa, or roasted vegetables.
Delicious Skinless Baked Chicken Breast with Herbs and Spices
If you want to add some flavor to your baked chicken breast, try this recipe that uses herbs and spices. Here’s what you’ll need:
- 4 skinless chicken breasts
- Salt and pepper
- Garlic powder
- Onion powder
- Paprika
- Dried thyme
- Dried rosemary
Instructions:
- Preheat your oven to 350°F.
- Season the chicken breasts with salt, pepper, garlic powder, onion powder, paprika, dried thyme, and dried rosemary.
- Place the chicken breasts in a baking dish.
- Bake for 25-30 minutes or until the internal temperature reaches 165°F.
This recipe is packed with flavor and pairs well with roasted sweet potatoes or green beans.
How Long to Bake Frozen Chicken Breast? Tips and Tricks
Baking Times for Frozen Chicken Breast
Baking frozen chicken breast can be a quick and easy solution for a weeknight dinner. However, it is important to note that baking times may vary depending on the size of the chicken breast and your oven’s performance.
For a 4-oz frozen chicken breast, the baking time at 350°F is approximately 50-60 minutes. If you are cooking multiple chicken breasts or larger ones, adjust your baking time accordingly.
Using a Meat Thermometer
While baking times are essential, it’s more important to ensure that the internal temperature of the chicken reaches 165°F to avoid foodborne illnesses. The best way to check this is by using a meat thermometer.
Insert the thermometer into the thickest part of the chicken breast, making sure not to touch any bones. Once it reads 165°F, your chicken is safe to eat.
Thawing Your Chicken Breast
If you have some extra time on your hands, thawing frozen chicken breast before baking can significantly reduce your cooking time. Here are two methods:
- Refrigerator: This method requires planning ahead as it takes around 24 hours for each pound of chicken. Place your frozen chicken in an airtight container or plastic bag and leave it in the fridge until fully thawed.
- Cold Water Bath: Fill a large bowl with cold water and place your frozen chicken in it. Change out the water every half hour until fully thawed (usually takes around one hour).
Thawing will also help ensure that your chicken cooks evenly throughout.
Baking Other Cuts of Chicken
While we’ve covered how long to bake frozen boneless skinless chicken breasts at 350°F, here are some other cuts of chicken and their approximate baking times:
- Drumsticks: For frozen drumsticks weighing around 4 oz each, bake for 35-45 minutes at 350°F.
- Whole Chicken: For a frozen whole chicken weighing around 5 lbs, bake for approximately two hours at 350°F.
- Thighs: For frozen chicken thighs weighing around 4 oz each, bake for 40-50 minutes at 350°F.
- Cutlets: For frozen chicken cutlets weighing around 2 oz each, bake for 20-25 minutes at 350°F.
- Wings: For frozen chicken wings weighing around 2 oz each, bake for approximately 25-30 minutes at 350°F.
Health Benefits of Chicken Breast and How to Prepare it for a Healthy Meal
What is chicken breast?
Chicken breast is the lean meat that comes from the underside of the chicken. It is one of the most popular cuts of chicken, known for its versatility, tenderness, and mild flavor. It’s also a great source of protein, essential vitamins, and minerals.
What are some of the health benefits of eating chicken breast?
There are many reasons why incorporating chicken breast into your diet can be beneficial for your health. Here are some of the top health benefits:
- Lean protein: Chicken breast is a rich source of lean protein, which helps build and repair muscle tissue.
- Low in fat: Compared to other cuts of meat like thighs or drumsticks, chicken breasts contain less fat.
- Boosts metabolism: The high protein content in chicken breast can help increase your metabolism and burn more calories.
- Rich in vitamins and minerals: Chicken breast contains essential nutrients such as vitamin B6, phosphorus, niacin, selenium, and potassium.
How to prepare chicken breast for a healthy meal?
Preparing chicken breasts is easy and can be done in various ways. Here are some options:
- Grilled Chicken Breast: Marinate boneless skinless chicken breasts with olive oil, garlic powder, salt & pepper then grill on medium-high heat until cooked through.
- Baked Chicken Breast: Preheat oven to 375°F (190°C). Place boneless skinless chicken breasts on a baking sheet lined with parchment paper or aluminum foil. Season with salt & pepper then bake until cooked through.
- Pan-Seared Chicken Breast: Heat olive oil in a non-stick skillet over medium-high heat. Season boneless skinless chicken breasts with salt & pepper then cook until browned on both sides.
- Slow Cooker Chicken Breast: Add boneless skinless chicken breasts to slow cooker along with your favorite seasonings and cook on low for 6-8 hours.
Chicken breast is a versatile ingredient that can be used in different types of meals.
Chicken breast is a great ingredient that can be used in various dishes, making it ideal for meal prep. Here are some examples:
- Chicken Caesar Salad: Top chopped romaine lettuce with sliced grilled chicken breast, croutons, parmesan cheese and caesar dressing.
- Stir Fry: Sautee sliced chicken breast with mixed vegetables (broccoli, carrots, bell peppers) and soy sauce over rice or noodles.
- Chicken Tacos: Shred cooked chicken breast and serve in tacos or burritos with diced tomatoes, avocado, shredded cheese and salsa.
- Chicken Fajitas: Slice grilled chicken breasts into strips and sauté with onions and bell peppers. Serve with tortillas, sour cream, guacamole and salsa.
Baking Chicken Breast Covered or Uncovered?
There are many ways to do it. However, one question that often arises is whether to bake chicken breast covered or uncovered. Both methods have their advantages and disadvantages, but ultimately the decision depends on what you’re looking for in your chicken.
Baking Chicken Breast Covered
Baking chicken breast covered helps to retain moisture and prevent the meat from drying out. Covering the chicken traps steam inside the baking dish, which creates a moist environment that keeps the meat tender and juicy. This method is particularly useful if you’re using boneless skinless chicken breasts, as they tend to dry out more easily than other cuts of chicken.
There are several ways to cover your chicken when baking:
- Use a baking dish with a lid: This is an easy way to cover your chicken while it bakes. Simply place your seasoned chicken breasts in a baking dish with a lid and cook according to your recipe.
- Cover with foil: If you don’t have a baking dish with a lid, you can cover your chicken with foil instead. Wrap the foil tightly around the edges of the dish to create a seal.
- Place another oven-safe dish on top: If you don’t have foil or a lid, you can place another oven-safe dish on top of your baking dish. This will help trap steam inside and keep your chicken moist.
Uncovered Chicken Breasts
If you prefer crispy skin or outer layer on your baked chicken breast, then cooking them uncovered may be ideal for you. The lack of moisture retention allows for evaporative cooling creating an outer layer that’s crispy.
However, if left uncovered too long without any basting or sauce application during cooking time could lead to overcooked surfaces causing dryness leading to overall poor taste.
Wrapping Chicken Breast Before Baking
Wrapping the chicken breast in foil before baking can also help to prevent dry surfaces. This method works by trapping steam inside the foil, which creates a moist environment similar to covering the chicken with a lid or foil. It also helps to infuse additional flavor into the meat if you add any seasonings or marinades before wrapping.
What To Do If Your Chicken Breast Is Overcooked?
If your chicken breast is overcooked and dry, there are several things you can do:
- Make a sauce: A flavorful sauce can help bring moisture back to your chicken breast. Try making a simple pan sauce using chicken broth, butter, and herbs.
- Add moisture: You can add moisture back to your chicken breast by brushing it with melted butter or olive oil before serving.
- Shred it: If your chicken breast is too dry to eat on its own, consider shredding it and using it in soups, salads, or sandwiches where other ingredients can compensate for its lack of moisture.
Tips and Tricks for Baking Frozen Chicken Breast
Cooking frozen chicken breast can be a challenging task, especially if you are not familiar with the right techniques. Unlike fresh chicken breast, frozen chicken requires additional cooking time to ensure that it is fully cooked and safe to eat.
Preparing Frozen Chicken Breast
Before baking your frozen chicken breast, there are a few things you need to do to prepare it properly:
- Preheat the Oven: Preheat your oven to 350°F before placing the frozen chicken on a baking sheet.
- Brush with Oil or Butter: Brushing your frozen chicken with oil or butter helps prevent it from drying out during cooking.
- Season Your Chicken: Add some seasoning to your frozen chicken breasts before baking them. You can use salt, pepper, garlic powder, onion powder, paprika or any other seasoning of your choice.
Cooking Frozen Chicken Breast
Here are some essential tips that you should keep in mind:
- Increase Cooking Time: Baking frozen chicken breast requires an additional 50% cooking time compared to fresh chicken breasts. For example, if you would typically cook fresh chicken at 350°F for 25-30 minutes, then add an extra 12-15 minutes when baking from frozen.
- Use a Meat Thermometer: To ensure that your baked frozen chicken is safe to eat, use a meat thermometer to check its internal temperature. The USDA recommends cooking poultry until it reaches an internal temperature of 165°F (74°C).
- Let It Rest: Once your baked frozen chicken has reached the recommended internal temperature of 165°F (74°C), remove it from the oven and let it rest for a few minutes before slicing and serving. This allows the juices to redistribute throughout the meat, making it more tender and juicy.
Storing Leftover Cooked Chicken Breasts
If you have leftover cooked chicken breasts, here are some tips on how to store them properly:
- Refrigerate: Store your leftover cooked chicken breasts in an airtight container or plastic bag and refrigerate them immediately after cooking.
- Use Within Four Days: Cooked chicken can be stored in the refrigerator for up to four days. Make sure to reheat it thoroughly before eating.
- Freeze: If you don’t plan on eating your leftover cooked chicken within four days, freeze it instead. Wrap it tightly in plastic wrap or aluminum foil and store it in an airtight container or freezer bag.
Bone-In vs Boneless Chicken Breast: How Long to Bake at 350°F?
Cooking chicken breast can be a bit tricky, especially if you’re not sure how long to cook it for. The cooking time of chicken breast depends on several factors, including whether it’s bone-in or boneless and its thickness.
Bone-In Chicken Breast
Bone-in chicken breast takes longer to cook than boneless chicken breast because the bones act as heat conductors, slowing down the cooking process. To ensure that your bone-in chicken breast is fully cooked, it’s essential to use a meat thermometer to check the internal temperature.
How Long to Bake Bone-In Chicken Breast at 350°F?
The general rule of thumb when baking bone-in chicken breast at 350°F is to cook it for approximately 30-40 minutes. However, this can vary depending on the size and thickness of the chicken breasts.
To ensure that your bone-in chicken breast is fully cooked, insert a meat thermometer into the thickest part of the meat without touching any bones. The internal temperature should read 165°F for safe consumption.
Boneless Chicken Breast
Boneless chicken breasts are easier and quicker to cook than their bone-in counterparts because they don’t have bones that slow down the cooking process. However, like with bone-in chicken breasts, it’s crucial to use a meat thermometer when cooking them.
How Long to Cook Boneless Chicken Breast in Oven at 350°F?
When baking boneless chicken breasts in an oven set at 350°F, you should cook them for approximately 25-30 minutes. Again, this can vary depending on their size and thickness.
To ensure that your boneless chicken breasts are fully cooked through without overcooking them, use a meat thermometer to check the internal temperature. The internal temperature should read 165°F for safe consumption.
Thickness of Chicken Breast
Regardless of whether you’re cooking bone-in or boneless chicken breasts, the thickness of the meat plays a significant role in determining how long it takes to cook. Thicker pieces take longer to cook than thinner ones, and this can affect the cooking time.
To ensure that your chicken breasts are cooked through evenly, try to keep them at a consistent thickness. If they’re not, you may need to adjust your cooking time accordingly.
Using a Meat Thermometer
Using a meat thermometer is essential when cooking chicken breast because it’s the only way to ensure that it’s fully cooked through and safe for consumption. When using a meat thermometer, insert it into the thickest part of the meat without touching any bones.
Once the internal temperature reaches 165°F, your chicken breast is ready to eat!
Tips and Tricks for Baking Chicken Breast in Foil
Use Heavy-Duty Aluminum Foil for Best Results
When baking chicken breast in foil, it’s important to use heavy-duty aluminum foil to ensure that the chicken stays moist and doesn’t dry out. Regular aluminum foil is too thin and can easily tear or puncture, which can result in a loss of moisture during cooking.
Heavy-duty aluminum foil is thicker and more durable than regular aluminum foil, making it ideal for baking chicken breast. It’s also less likely to tear or puncture, so you can wrap the chicken breast tightly without worrying about the foil breaking.
Spray the Foil with Cooking Spray to Prevent Sticking
Another trick for baking chicken breast in foil is to spray the foil with cooking spray before adding the chicken. This will prevent the chicken from sticking to the foil and make it easier to remove once it’s cooked.
To do this, simply lay a sheet of heavy-duty aluminum foil on a flat surface and lightly coat it with cooking spray. Then place your seasoned chicken breast on top of the sprayed side of the foil before wrapping it up tightly.
Fold the Foil Tightly Around the Chicken Breast to Trap in Moisture
One of the key benefits of baking chicken breast in foil is that it helps trap in moisture, resulting in juicy and tender meat. To achieve this, make sure you fold your aluminum foil tightly around each individual piece of chicken.
Start by placing your seasoned chicken breast on a sheet of heavy-duty aluminum foil that has been coated with cooking spray. Then bring up both sides of the foil over top of the chicken breast so they meet at the center. Fold down both edges several times until they are flush against the surface of the meat. Finally, roll up each end towards center until you have created a tight seal around your chicken.
Place The Foil-Wrapped Chicken Breast on A Baking Sheet for Easy Cleanup
When you’ve wrapped your chicken breast tightly in foil, place it on a baking sheet before putting it in the oven. This will make it easier to handle and also prevent any juices from dripping onto the bottom of your oven.
Using a baking sheet also makes cleanup a breeze since any drippings or spills will be contained on the sheet instead of all over the inside of your oven. Plus, you can reuse the baking sheet multiple times without having to worry about scrubbing away burnt-on chicken residue.
How to Convert US Customary Ingredients to Metric for Chicken Rice Casserole
Cooking is a science, and accurate measurements are crucial for a successful dish. If you’re used to using US customary measurements but need to convert them to metric for a chicken rice casserole recipe, don’t worry! With the help of conversion charts or online calculators, it’s easy to make the switch.
Why Accurate Measurements Matter
Cooking is all about precision. Using too much or too little of an ingredient can completely change the outcome of your dish. Accuracy is especially important.
When making a chicken rice casserole recipe, you want the chicken breast to be fully cooked through without drying out. Using inaccurate measurements could result in undercooked or overcooked chicken, ruining the entire dish.
Converting US Customary Measurements to Metric
Converting US customary measurements to metric may seem daunting at first, but it’s actually quite simple. The key is knowing the conversion rates and having access to a conversion chart or online calculator.
Here are some common conversions you’ll need for your chicken rice casserole recipe:
- 1 pound of chicken breast = 0.45 kilograms
- 1 cup of rice = 240 milliliters
- 1 tablespoon of butter = 14 grams
- 1 teaspoon of salt = 5 grams
To use these conversions in your recipe, simply multiply or divide as needed. For example, if your original recipe calls for two pounds of chicken breast but you only have one kilogram on hand, you’ll need to adjust accordingly by using approximately 2.2 pounds instead.
Conversion Charts vs Online Calculators
There are two main ways to convert US customary ingredients to metric: using a conversion chart or an online calculator.
Conversion charts are readily available online and provide quick reference points for common conversions. They’re great for simple recipes with only a few ingredients.
Online calculators, on the other hand, are more precise and can handle more complex recipes. Simply enter the amount of each ingredient in US customary units, and the calculator will convert it to metric for you.
Tips for Accurate Measurements
Converting measurements is just one part of ensuring accuracy in your recipe. Here are some additional tips to keep in mind:
- Use a kitchen scale: Measuring cups and spoons can be inaccurate, especially when measuring dry ingredients like flour or sugar. A kitchen scale provides precise measurements every time.
- Read the recipe carefully: Make sure you understand what each measurement refers to (e.g., liquid vs dry) and whether it’s referring to a weight or volume.
- Double-check your conversions: It’s always a good idea to double-check your conversions before starting to cook. This can help prevent mistakes that could ruin your dish.
Tips and Tricks for Moist and Tender Baked Chicken Breast
Marinating with Lemon Juice
One of the best ways to ensure moist and tender baked chicken breast is by marinating it in lemon juice. Not only does this add a tangy flavor, but it also helps to break down the fibers in the meat, making it more tender. To achieve this, squeeze fresh lemon juice over the chicken breast, making sure to coat both sides. Then cover and let it sit in the fridge for at least 30 minutes before baking.
Adding Lemon Juice Before Baking
If you’re short on time or don’t want to marinate your chicken breast beforehand, adding a splash of lemon juice on top of it before baking can also help keep it moist and juicy. Simply drizzle some fresh lemon juice over the chicken breast before putting it in the oven.
Checking for Doneness
Knowing when your baked chicken breast is done is crucial to avoid undercooking or overcooking it. The internal temperature should reach 165°F (75°C) when measured with a meat thermometer inserted into the thickest part of the meat. Another way to check if your chicken is done is by cutting into it – if there’s no pink color left and juices run clear, then you’re good to go.
Letting It Rest
After taking your baked chicken breast out of the oven, let it rest for a few minutes before slicing into it. This allows the juices inside to redistribute throughout the meat, making it more flavorful and tender.
Brining
Another method that can help make your baked chicken breast moist and tender is brining. Brining involves soaking the meat in a saltwater solution for several hours or overnight before cooking. This not only helps to keep the meat moist but also adds flavor. To make a simple brine solution for chicken breast, mix 1/4 cup kosher salt with 4 cups of water until the salt is dissolved. Add your chicken breast to the solution and let it sit in the fridge for at least 2 hours before baking.
Using a Meat Thermometer
Investing in a meat thermometer is an easy way to ensure that your baked chicken breast is cooked to perfection every time. Simply insert the thermometer into the thickest part of the meat, making sure not to touch any bones, and check that it has reached 165°F (75°C).
Other Tips
- Don’t overcook your chicken breast as this can cause it to become dry and tough.
- Avoid using high heat when cooking as this can also dry out the meat.
- Covering your chicken with foil while baking can help keep it moist.
- Consider adding other seasonings such as garlic, herbs, or spices to enhance the flavor.
Cooking Chicken Breast at Higher Temperatures: Tips and Tricks
Different Cooking Method for High Heat
Cooking chicken breast at higher temperatures requires a different cooking method than low heat. Low heat cooking is best used for slow-cooking dishes, while high heat cooking is ideal for quick searing and grilling. When you cook chicken breast at higher temperatures, it’s important to keep an eye on the meat to prevent overcooking or drying out.
Grilling is a Great Option
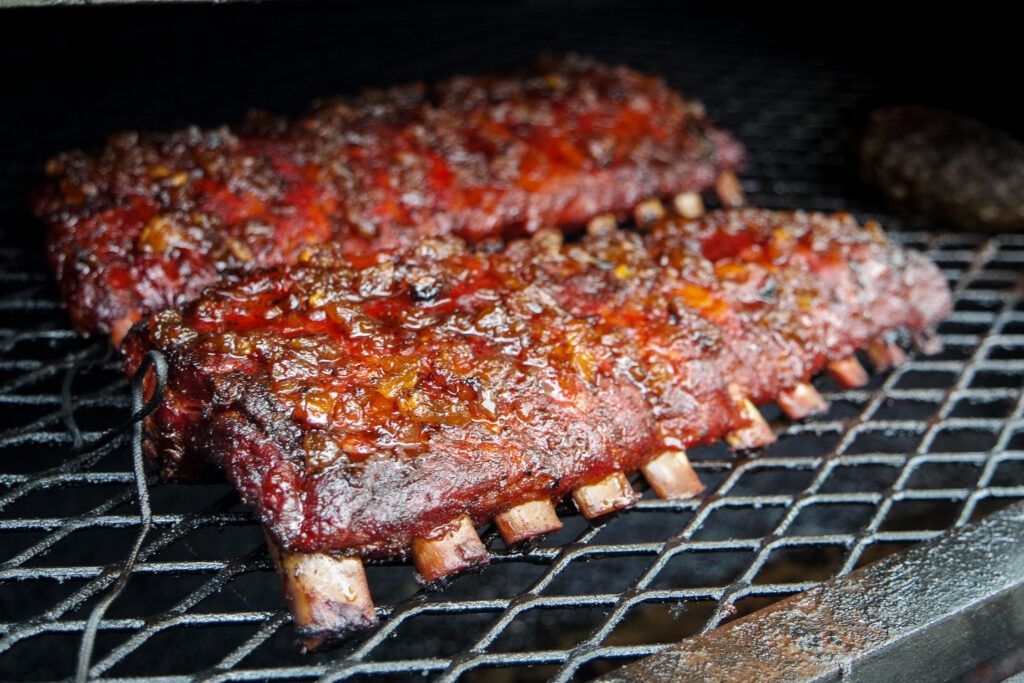
Grilling is one of the best ways to cook chicken breast at higher temperatures. It allows you to get that crispy exterior while keeping the inside moist and juicy. To grill chicken breast, preheat your grill to medium-high heat (around 350°F). Brush the chicken with oil and season it with salt and pepper. Place it on the grill, cover it, and cook for 6-8 minutes per side or until the internal temperature reaches 165°F.
Use a Meat Thermometer
Using a meat thermometer is essential when cooking chicken breast at higher temperatures. This will ensure that the internal temperature of the chicken reaches 165°F, which is the minimum safe temperature according to USDA guidelines. Insert the thermometer into the thickest part of the chicken breast without touching bone or fat. Once it reads 165°F, remove from heat immediately.
Other Methods for High Heat Cooking
Aside from grilling, there are other methods you can use to cook chicken breast at higher temperatures:
- Searing: Heat up some oil in a pan over high heat until smoking hot. Add seasoned chicken breasts and sear them for around 2-3 minutes per side until browned.
- Broiling: Preheat your oven’s broiler on high heat and place seasoned chicken breasts on a baking sheet lined with foil. Broil them for around 6-8 minutes per side or until cooked through.
- Roasting: Preheat your oven to 425°F and place seasoned chicken breasts on a baking sheet. Roast them for around 20-25 minutes or until the internal temperature reaches 165°F.
How to Know Chicken Breast is Cooked?
The most reliable way to know if chicken breast is cooked is by using a meat thermometer. Once the internal temperature reaches 165°F, it’s safe to eat. However, there are other ways you can check if the chicken breast is cooked:
- Cut into it: If the juices run clear and there’s no pinkness left in the center, then it’s cooked through.
- Check texture: If the chicken feels firm and springy when pressed with a finger, then it’s done.
- Use a timer: Follow cooking time guidelines based on weight or thickness of the chicken breast.
Best Temperature for Baking Chicken Breast: What Temperature Should the Chicken Be?
If you’re wondering how long to cook chicken breast at 350, it’s essential to know that the best temperature for baking chicken breast is 165°F. Cooking chicken breast can be tricky as it’s easy to overcook or undercook, and both can ruin your dish. Therefore, using a meat thermometer is crucial in ensuring that your chicken is cooked correctly.
Use a Meat Thermometer
Using a meat thermometer is the most reliable method of determining if your chicken breast has reached the right temperature. Insert the thermometer into the thickest part of the chicken breast, making sure not to touch any bones as they can give false readings.
Avoid Overcooking
Overcooking your chicken breast can result in dry and tough meat that no one wants to eat. The ideal internal temperature of cooked chicken should be 165°F. Once your chicken reaches this temperature, take it out of the oven immediately.
Let It Rest
After cooking your chicken breast, let it rest for a few minutes before slicing into it. This allows time for the juices to redistribute throughout the meat, resulting in moist and flavorful chicken.
When cooking boneless skinless chicken breasts at 350°F (177°C), here are some estimated cooking times:
- 4 oz – 20-25 minutes
- 6 oz – 25-30 minutes
- 8 oz – 30-35 minutes
These times may vary depending on how thick your chicken breasts are. Therefore, using a meat thermometer is always recommended to ensure that they have reached an internal temperature of 165°F.
It’s also important to note that different types of ovens may cook food differently. For example, convection ovens tend to cook food faster than conventional ovens due to their fan-assisted heat circulation system. Therefore, you may need to adjust your cooking time and temperature accordingly.
Oven-Baked Chicken Breast Recipe with Tips and Tricks
Are you wondering how long to cook chicken breast at 350 degrees Fahrenheit? Look no further! This oven-baked chicken breast recipe is easy, delicious, and foolproof. With just a few simple ingredients and some handy tips and tricks, you’ll have perfectly cooked chicken breasts in no time.
Ingredients
- 4 boneless, skinless chicken breasts (4-6 oz each)
- 2 tbsp olive oil
- 1 tsp onion powder
- 1 tsp salt
Instructions
- Preheat your oven to 350°F.
- Prepare a baking sheet by lining it with parchment paper or lightly greasing it with cooking spray.
- In a small bowl, mix together the olive oil, onion powder, and salt.
- Place the chicken breasts on the baking sheet and brush them generously with the olive oil mixture.
- Bake for 25-30 minutes or until the internal temperature of the chicken reaches 165°F.
Tips and Tricks
Use a Meat Thermometer
One of the most important things you can do when cooking any type of meat is to use a meat thermometer. This will help ensure that your food is cooked to a safe temperature without overcooking it.
For this recipe, insert a meat thermometer into the thickest part of each chicken breast before putting them in the oven. Make sure that the thermometer does not touch any bones as this can give you an inaccurate reading.
Pound Your Chicken Breasts Evenly
If your chicken breasts are not all evenly sized, they will cook at different rates which can result in dry or undercooked meat. To avoid this problem, pound your chicken breasts so that they are all an even thickness.
To do this, place each chicken breast between two sheets of plastic wrap or parchment paper and gently pound them with a meat mallet or rolling pin until they are an even thickness. This will help them cook more evenly and result in juicier, more tender chicken.
Add Roasted Vegetables
While your chicken is baking, why not add some roasted vegetables to the same baking sheet? Simply chop up your favorite veggies (such as broccoli, carrots, or sweet potatoes) and toss them with a little olive oil, salt, and pepper. Then spread them out on the baking sheet around the chicken breasts and bake everything together for a complete meal.
Try Using an Air Fryer
If you have an air fryer, you can also use it to cook chicken breasts at 350°F. Simply place the seasoned chicken breasts in the air fryer basket and cook for 20-25 minutes or until they reach an internal temperature of 165°F.
Air fryers are a great alternative to traditional ovens because they cook food quickly and evenly while also giving it a crispy exterior. Plus, they don’t heat up your kitchen like a regular oven does!
Bone-In Chicken Breast Temperature: How Long to Cook at 350°F?
Cooking bone-in chicken breast can be a bit tricky, especially if you’re not sure how long to cook it or what temperature to use.
Use a Meat Thermometer to Check the Internal Temperature of Bone-In Chicken Breast
One of the most important things when cooking bone-in chicken breast is to ensure that it’s cooked through. The best way to do this is by using a meat thermometer. Insert the meat thermometer into the thickest part of the chicken breast, making sure not to touch any bones.
Cook Bone-In Chicken Breast at 350°F Until It Reaches an Internal Temperature of 165°F
The USDA recommends cooking bone-in chicken breast at 350°F until it reaches an internal temperature of 165°F. This ensures that any harmful bacteria are killed and that your chicken is safe to eat.
The Cooking Time for Bone-In Chicken Breast at 350°F Varies Depending on Its Weight
The cooking time for bone-in chicken breast varies depending on its weight. As a general rule, you should cook your chicken for about 20-25 minutes per pound. However, it’s always best to use a meat thermometer as your guide rather than relying solely on cooking time.
Here’s a quick guide for cooking times:
- For a 2-pound bone-in chicken breast, cook for approximately 40-50 minutes.
- For a 3-pound bone-in chicken breast, cook for approximately 60-75 minutes.
- For larger cuts of meat, such as a whole turkey or roasting chickens, consult more in-depth guides online or in print.
Let the Chicken Rest for a Few Minutes After Cooking to Allow the Juices to Redistribute
Once your bone-in chicken breast has reached an internal temperature of 165°F, remove it from the oven and let it rest for a few minutes. This allows the juices to redistribute throughout the meat, making it juicier and more flavorful.
Crock Pot Chicken Recipes: Bourbon Chicken and Chicken and Dumplings
If you’re looking for an easy and delicious way to cook chicken breasts, look no further than your crock pot. With minimal prep time, you can have a tasty meal ready to go in just a few hours.
Crock Pot Bourbon Chicken Recipe
Bourbon chicken is a sweet and savory dish that pairs well with rice or noodles. Here’s what you’ll need:
- 4 boneless, skinless chicken breasts
- 1/2 cup brown sugar
- 1/2 cup soy sauce
- 1/4 cup bourbon
- 2 cloves garlic, minced
- 1 teaspoon ginger powder
- 1/4 teaspoon red pepper flakes (optional)
- 1/4 cup chicken broth
- Salt and pepper to taste
Instructions:
- Place the chicken breasts in the crock pot.
- In a separate bowl, mix together the brown sugar, soy sauce, bourbon, garlic, ginger powder, red pepper flakes (if using), chicken broth, salt, and pepper.
- Pour the mixture over the chicken breasts.
- Cook on low heat for 4-6 hours.
- Once cooked through, shred the chicken with two forks.
The result is tender and juicy shredded chicken with a sweet and tangy flavor thanks to the brown sugar and bourbon marinade.
Crock Pot Chicken and Dumplings Recipe
Chicken and dumplings is a classic comfort food that’s perfect for chilly evenings or when you need something hearty to warm you up. Here’s what you’ll need:
For the stew:
- 4 boneless, skinless chicken breasts
- 3 cups chicken broth
- 2 cups frozen mixed vegetables
- 1 onion, chopped
- 2 cloves garlic, minced
- 1 teaspoon thyme
- Salt and pepper to taste
For the dumplings:
- 2 cups all-purpose flour
- 1 tablespoon baking powder
- 1 teaspoon salt
- 1/4 cup butter, melted
- 3/4 cup milk
Instructions:
- Place the chicken breasts in the crock pot.
- Add the chicken broth, mixed vegetables, onion, garlic, thyme, salt, and pepper.
- Cook on low heat for 6-8 hours.
- Once cooked through, remove the chicken from the crock pot and shred with two forks.
- In a separate bowl, mix together the flour, baking powder, salt, melted butter, and milk until a dough forms.
- Drop spoonfuls of dough into the crock pot.
- Turn up heat to high and cook for an additional hour.
The result is a thick and creamy stew with tender shredded chicken and fluffy dumplings.
Both of these recipes call for chicken broth to enhance the flavors of the dish.
Storage, Perfectly Baked, and Cooked Moist & Tender Chicken Breast Tips
Store Raw Poultry in the Fridge Below 40°F to Prevent Bacterial Growth
Proper storage is crucial. Raw poultry can harbor harmful bacteria such as Salmonella and Campylobacter that can cause foodborne illnesses. Therefore, it’s important to store raw poultry in the fridge below 40°F to prevent bacterial growth.
To ensure your chicken stays fresh and safe to eat, keep it in its original packaging until you’re ready to cook it. If you need to transfer the chicken to a different container, make sure it’s airtight and labeled with the date of purchase.
Use Parchment Paper to Prevent Chicken from Sticking to the Dish While Baking
Cooking chicken breast can be tricky because it tends to dry out quickly. However, using parchment paper while baking can help lock in moisture and prevent the chicken from sticking to the dish.
To use parchment paper, line your baking dish with a sheet of parchment paper before placing your seasoned chicken on top. This will not only prevent sticking but also make clean-up easier.
Cook Chicken Until It Reaches an Internal Temperature of 165°F for Safe Consumption
Cooking chicken breast at 350°F is a popular method because it ensures even cooking without overcooking or drying out the meat. However, it’s important to check that your chicken has reached an internal temperature of 165°F before consuming.
Use a meat thermometer inserted into the thickest part of the meat without touching bone or gristle. Once your chicken reaches 165°F internally, remove it from heat immediately.
Let Cooked Chicken Rest for 5 Minutes Before Serving To Retain Juices and Ensure Tenderness
Once you’ve removed your perfectly cooked chicken from heat, let it rest for five minutes before serving. This allows the juices to redistribute throughout the meat, ensuring tenderness and flavor.
Cover your chicken with a piece of foil or a lid while it rests. This will keep it warm and prevent it from drying out.
For Crispy Skin, Bake Chicken at a Higher Temperature or Broil for the Last Few Minutes of Cooking
If you want crispy skin on your chicken breast, consider baking at a higher temperature or broiling for the last few minutes of cooking. This will help create that golden brown and crispy texture that’s so delicious.
To do this, increase your oven temperature to 400°F for the last 5-10 minutes of cooking time or turn on your broiler for the last few minutes until the skin is crispy.
How Long to Cook Chicken at 350°F: Baked Chicken Tenderloins (+Tips & Tricks!)
Chicken tenderloins are a lean and versatile cut of meat that can be cooked in various ways. One of the most popular methods is baking them at 350°F.
Cooking Time and Temperature
Cooking chicken tenderloins at 350°F for 20-25 minutes ensures they are fully cooked through. The exact cooking time may vary depending on the thickness of the meat, so it’s essential to use a meat thermometer to check the internal temperature.
Marinating or Brushing with Olive Oil
To prevent dryness, marinate the chicken tenderloins before cooking or brush them with olive oil. A simple marinade made from lemon juice, garlic, salt, pepper, and olive oil can add flavor and moisture to the meat.
Using a Meat Thermometer
Use a meat thermometer to ensure the internal temperature of the chicken reaches 165°F. Insert it into the thickest part of each tenderloin without touching the bone or pan. If you don’t have a thermometer, you can also check if there is no pink color inside and that juices run clear when pierced with a fork.
Resting Time
Letting the chicken rest for a few minutes before slicing and serving helps retain its juices. Cover it loosely with foil after removing it from the oven for about five minutes before cutting.
Tips & Tricks
Here are some additional tips for making perfect baked chicken tenderloins:
- Pound them evenly: Use a meat mallet or rolling pin to pound each piece of chicken evenly to ensure they cook uniformly.
- Season generously: Don’t be afraid to season your chicken liberally with herbs, spices, or your favorite seasoning blend.
- Use a baking dish: Baking chicken tenderloins in a dish can help keep them moist and prevent them from drying out. You can also add vegetables like carrots, potatoes, or onions to the pan for a one-pan meal.
- Add cheese: If you like cheesy chicken, you can sprinkle some shredded cheese on top of the tenderloins during the last few minutes of baking and broil until melted.
- Make it crispy: For crispy chicken tenderloins, coat them with breadcrumbs or panko before baking. You can also use an air fryer or shallow fry them in oil for a crunchy exterior.
Easy Ways to Prepare Reheated Chicken: Tips and Tricks
Reheating chicken can be a tricky task, especially if you’re not sure how long to cook it for or what temperature to use. Whether you have leftover chicken from last night’s dinner or raw chicken that needs cooking, there are several easy ways to prepare reheated chicken.
Reheat Chicken Breast by Placing It in the Oven
One of the most popular methods for reheating chicken breast is by placing it in the oven. This method is perfect for those who want their chicken to be crispy on the outside and juicy on the inside. To reheat your chicken breast in the oven, follow these steps:
- Preheat your oven to 350°F.
- Place your cold chicken breast in an oven-safe dish.
- Cover the dish with foil to prevent moisture loss.
- Bake for 20-30 minutes until heated through.
If you’re using raw chicken instead of cooked leftovers, make sure that it has reached an internal temperature of 165°F before consuming.
Microwave Your Chicken for Quick Heating
If you’re short on time and need your chicken reheated quickly, then microwaving it might be your best option. Here’s how:
- Place your cold or frozen chicken breast on a microwave-safe plate.
- Add a tablespoon of water or broth over the top of the meat.
- Cover with a damp paper towel or microwave-safe lid.
- Microwave on high heat for 2-3 minutes (depending on thickness) until heated through.
Be careful not to overcook your chicken as this can cause it to become dry and tough.
Pan Fry Your Chicken for Extra Flavor
Another easy way to reheat your chicken breast is by pan-frying it with some oil and pepper seasoning. This method gives you more control over how crispy you want your skin while adding extra flavor at the same time. To pan fry your chicken breast, follow these steps:
- Heat up a tablespoon of oil in a non-stick skillet over medium-high heat.
- Season your cold or frozen chicken breast with salt and pepper.
- Place the chicken in the skillet and cook for 3-4 minutes on each side until crispy and heated through.
This method is perfect for those who want to add some extra flavor to their reheated chicken.
Other Ways to Reheat Your Chicken
If you don’t have an oven or microwave available, there are other ways to reheat your chicken breast. Here are some additional methods:
- Boil your chicken breast in hot water for 10-15 minutes until heated through.
- Grill your chicken breast on a stovetop grill pan for 3-4 minutes on each side until crispy and heated through.
- Use a slow cooker or crockpot to reheat large batches of chicken at once.
Tips for Cooking Moist & Tender Chicken Breast in the Oven
Cooking chicken breast can be a daunting task, especially if you want to keep it moist and tender. The oven is an excellent tool for cooking chicken breast, but it’s essential to know how long to cook it at 350°F and how to prepare it properly beforehand.
Use a Meat Thermometer to Check the Internal Temperature of the Chicken Breast
The best way to ensure that your chicken breast is cooked correctly is by using a meat thermometer. Insert the thermometer into the thickest part of the chicken breast, making sure not to touch the bone. The internal temperature should reach 165°F, indicating that the chicken is fully cooked.
Brine the Chicken Breast Before Cooking to Keep It Moist and Flavorful
Brining is an excellent technique for keeping your chicken moist and flavorful. To brine your chicken breast, mix water with salt or other seasonings like rosemary or garlic in a container large enough to hold your chicken breasts. Let them soak in this mixture for at least an hour before cooking.
Let the Chicken Rest for 5-10 Minutes After Cooking to Allow Juices to Redistribute
After removing your chicken from heat, let it rest on a cutting board or plate covered with foil for five minutes before slicing into it. This allows time for juices within the meat to redistribute throughout its fibers, resulting in juicier and more flavorful meat.
Brush the Chicken with Oil or Butter Before Cooking to Prevent It from Drying Out
Brushing your chicken breasts with oil or butter before cooking them helps prevent them from drying out while baking. You can also add additional seasonings like garlic powder or paprika for extra flavor.
Cover the Chicken with Foil While Cooking to Retain Moisture
Covering your chicken breasts with foil while they cook helps retain moisture within their fibers. You can remove this foil during the last few minutes of cooking to allow the chicken’s skin to crisp up and turn golden brown.
Recap on Cooking Time for Chicken Breast at 350°F
In conclusion, cooking chicken breast at 350°F is a great way to ensure that it is cooked through without drying it out. The cooking time will vary depending on whether the chicken breast is boneless or bone-in, fresh or frozen. It is important to use a meat thermometer to check the internal temperature of the chicken and make sure it reaches at least 165°F before consuming.
To summarize, here are some key takeaways:
- Boneless chicken breast should be baked for approximately 20-25 minutes at 350°F.
- Bone-in chicken breast should be baked for approximately 35-45 minutes at 350°F.
- Frozen chicken breast should be thawed before baking and may require an additional 5-10 minutes of cooking time.
- Covering the chicken while baking can help retain moisture, but uncovering it during the last few minutes can help crisp up the skin.
If you’re looking for more tips and tricks on how to cook moist and tender chicken breast, check out our other articles on oven-baked recipes, health benefits of chicken breast, and reheating leftovers. Don’t forget to try out our delicious oven-baked chicken recipe with step-by-step instructions!
FAQs:
How do I know when my chicken breast is fully cooked?
The best way to determine if your chicken breast is fully cooked is by using a meat thermometer. Insert the thermometer into the thickest part of the meat without touching any bones and make sure it reads at least 165°F.
Can I bake frozen chicken breasts?
Yes, but they must be thawed first before baking. Thaw them in the refrigerator overnight or use a defrost function on your microwave.
Should I cover my baking dish when cooking bone-in chicken breasts?
Covering your baking dish when cooking bone-in chicken breasts can help keep them moist. However, if you want crispy skin, uncover the chicken for the last few minutes of cooking.
How do I keep my chicken breast from drying out?
To keep your chicken breast moist, avoid overcooking it and use a meat thermometer to check the internal temperature. You can also marinate it beforehand or brush it with olive oil or butter while baking.
What are some healthy ways to prepare chicken breast?
Some healthy ways to prepare chicken breast include grilling, baking, roasting, and poaching. Avoid frying or using heavy sauces that are high in calories and fat.
0 Comments