Rotisserie Chicken How Long to Cook?
Love the mouthwatering aroma of rotisserie chicken? Want to know how to recreate that deliciousness in your own kitchen? Look no further! Homemade rotisserie chicken is easier than you think, and we’re here to show you the ropes.
Rotisserie chicken isn’t just about convenience; it’s a flavor-packed game-changer. From succulent sandwiches to hearty salads, this versatile bird can elevate any meal. But have you ever wondered about its origins? Let’s take a quick trip through history and explore how cooking chicken on a rotisserie became a culinary sensation.
Whether you have a dedicated rotisserie oven or simply an attachment for your grill, we’ve got you covered. In this guide, we’ll walk you through the steps, sharing insider tips along the way. So get ready to impress your friends and family with juicy, tender rotisserie chickens that will leave them begging for more!
Now let’s dive into the world of irresistible rotisserie chicken goodness.
Thermal Tips for Perfect Homemade Rotisserie Chicken
Importance of Temperature Control
Temperature control is key. Achieving the perfect balance of juicy meat and crispy skin requires careful monitoring of heat throughout the cooking process. By understanding the importance of temperature control, you can ensure that your homemade rotisserie chicken turns out delicious every time.
Using a Meat Thermometer
To accurately gauge the internal temperature of your rotisserie chicken, it is essential to use a meat thermometer. This handy tool allows you to measure the doneness of the chicken without relying on guesswork. Simply insert the thermometer into the thickest part of the thigh meat, making sure not to touch bone or gristle.
Ideal Internal Temperature
The ideal internal temperature for perfectly cooked rotisserie chicken is 165°F (74°C). At this temperature, both white and dark meat will be juicy and safe to eat. To ensure accuracy, make sure to read your thermometer correctly by waiting a few seconds after inserting it into the chicken before checking the reading.
Mastering Indirect Heat
One technique that guarantees even cooking and crispy skin on your homemade rotisserie chicken is using indirect heat. This involves positioning your grill burners so that they are not directly beneath the bird. Instead, place them on either side or turn off one burner entirely if you have multiple burners.
Indirect heat allows for slower cooking, which helps retain moisture in the meat while allowing enough time for the skin to crisp up beautifully. To further enhance crispiness, pat dry your chicken with paper towels before placing it on the rotisserie spit.
By mastering indirect heat and ensuring proper temperature control with a meat thermometer, you’ll be well on your way to achieving restaurant-quality rotisserie chicken right in your own backyard.
Achieving No-Fuss Rotisserie Chicken on the Grill
Grilling rotisserie chicken can be a delicious and easy way to enjoy a flavorful meal. Whether you’re using a grill, air fryer, or oven, achieving perfectly cooked rotisserie chicken doesn’t have to be complicated. With a few simple tips and tricks, you’ll be able to create juicy and crispy chicken every time.
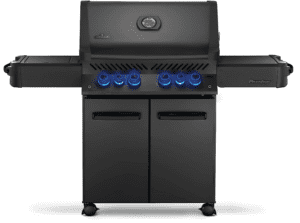
Prepare Your Grill for Hassle-Free Rotisserie Cooking
Before you start grilling your rotisserie chicken, it’s essential to prepare your grill properly. This ensures that the cooking process goes smoothly and without any hiccups. Here are some steps to follow:
- Clean the grill grates: Make sure your grill grates are clean before cooking. Use a brush to remove any leftover food or debris from previous grilling sessions.
- Set up indirect heat: For rotisserie cooking, it’s best to use indirect heat rather than placing the chicken directly over the flames. This helps prevent flare-ups and ensures even cooking.
- Use aluminum foil: To catch any drippings from the chicken and prevent flare-ups, place a drip pan lined with aluminum foil under the rotisserie attachment.
- Preheat the grill: Allow your grill to preheat for about 10-15 minutes before adding the chicken. This ensures that it reaches the desired temperature for optimal cooking.
Tips for Setting up Your Grill’s Rotisserie Attachment with Ease
Setting up your grill’s rotisserie attachment may seem intimidating at first, but with these tips, you’ll become a pro in no time:
- Read the manual: Familiarize yourself with your specific grill model’s instructions for attaching and securing the rotisserie rod and forks correctly.
- Securely fasten the chicken: Make sure that you tightly secure the chicken onto the rotisserie rod using forks or other attachments provided. This prevents the chicken from wobbling or falling off during cooking.
- Balance the weight: Ensure that the weight of the chicken is evenly distributed on the rotisserie rod to avoid any imbalances that could affect the rotation.
- Keep a watchful eye: While cooking, periodically check to ensure that the chicken is rotating smoothly and not getting stuck or tangled.
Techniques to Prevent Flare-ups While Grilling Rotisserie Chicken
Flare-ups can occur when fat drips onto hot coals or flames, resulting in charred and unevenly cooked chicken. To prevent flare-ups:
- Trim excess fat: Before grilling, trim any excess fat from the chicken to minimize dripping and reduce flare-up risks.
- Use indirect heat: As mentioned earlier, using indirect heat helps prevent flare-ups by keeping the chicken away from direct contact with flames.
- Avoid high flames: Adjust your grill’s flame settings to a moderate level to avoid excessive heat that can lead to flare-ups.
Ways to Maintain Consistent Heat Throughout the Grilling Process
Maintaining consistent heat is crucial for achieving perfectly cooked rotisserie chicken. Here are some tips:
- Use charcoal briquettes: If you’re using a charcoal grill, opt for charcoal briquettes instead of lump charcoal. Briquettes provide more consistent heat due to their uniform shape and size.
Step-by-Step Guide to Cooking Rotisserie Chicken at Home
Cooking rotisserie chicken at home is a delicious and satisfying way to enjoy this classic dish. With a few simple steps, you can achieve juicy and flavorful results that will impress your family and friends. Follow this step-by-step guide to master the art of rotisserie chicken cooking in the comfort of your own home.
Preparing, Seasoning, and Trussing Your Whole Chicken
Before you begin cooking, it’s essential to properly prepare your whole chicken. Start by removing any giblets or excess fat from the cavity. Rinse the chicken thoroughly under cold water and pat it dry with paper towels.
Next, season the bird generously with your favorite blend of herbs and spices. A classic combination includes salt, pepper, garlic powder, paprika, and thyme. Rub the seasoning mixture all over the chicken, ensuring every inch is well-coated for maximum flavor.
To truss the chicken, use kitchen twine to tie together its legs securely. This helps maintain its shape while on the rotisserie and ensures even cooking throughout.
Securing Your Bird onto the Spit Rod Properly
Once your chicken is seasoned and trussed, it’s time to secure it onto the spit rod properly. Slide one end of the rod through the cavity of the bird until it reaches out through its neck opening. Make sure that the bird is centered on the rod to ensure balanced rotation during cooking.
To secure it in place, insert holding forks into each side of the chicken near its wings or drumsticks. These forks will prevent any movement or slippage while rotating on the grill or in your oven.
Setting up Your Grill or Oven for Rotisserie Cooking
Whether you’re using a grill or an oven for rotisserie cooking, proper setup is crucial for achieving optimal results.
If using a grill:
- Preheat your grill to medium-high heat.
- Place a drip pan under the area where the chicken will be rotating to catch any drippings.
- Set up your rotisserie attachment according to the manufacturer’s instructions.
- Turn on the rotisserie motor and let it start rotating.
If using an oven:
- Preheat your oven to 350°F (175°C).
- Place a drip pan on the lower rack of the oven to catch any drippings.
- Insert the spit rod into the designated rotisserie slots in your oven.
- Turn on the rotisserie function and set it to rotate at a moderate speed.
Adjusting Cook Times Based on Different Sizes of Chickens
Cook times for rotisserie chicken can vary depending on the size of the bird you’re cooking. As a general rule, allow about 20 minutes per pound (450 grams) of chicken.
To ensure that your chicken is cooked thoroughly, use a meat thermometer inserted into the thickest part of the thigh without touching bone. The internal temperature should reach 165°F (74°C) for safe consumption.
Remember that these times are approximate, and it’s always best to rely on an accurate meat thermometer for perfect results every time.
By following this step-by-step guide, you’ll be able to cook delicious rotisserie chicken at home with ease.
Essential Seasoning Tips for Flavorful Rotisserie Chicken
The right seasonings can make all the difference. Elevate your bird from ordinary to extraordinary with these essential seasoning tips that will ensure a flavorful and mouthwatering result every time.
Explore Various Seasoning Options
To enhance the flavor of your rotisserie chicken, consider experimenting with different seasoning options. Here are some ideas to get you started:
- Dry rubs: Dry rubs are a simple yet effective way to add flavor to your chicken. Create a blend using ingredients like garlic powder, paprika, onion powder, salt, and other spices of your choice. Massage the dry rub onto the skin and let it sit for at least an hour before cooking.
- Marinades: Marinating your chicken before cooking can infuse it with incredible flavors. Prepare a marinade using ingredients such as olive oil, garlic, herbs like thyme or rosemary, lemon juice, salt, and pepper. Allow the chicken to soak in the marinade for several hours or overnight for maximum flavor penetration.
- Brines: Brining involves soaking the chicken in a solution of water, salt, sugar, and spices. This technique helps tenderize the meat while imparting flavors throughout. Experiment with different brine recipes by adding herbs like sage or bay leaves and spices such as black peppercorns or chili flakes.
Discover Classic Herbs and Spices
Certain herbs and spices have long been known to complement rotisserie chicken perfectly. Consider incorporating these classics into your seasoning repertoire:
- Garlic powder: Garlic adds depth and complexity to any dish. Sprinkle some garlic powder over your bird before cooking to give it a savory kick.
- Paprika: Paprika not only imparts a beautiful reddish hue but also lends a subtle smoky flavor that pairs wonderfully with rotisserie chicken.
- Onion powder: Onion powder brings a touch of sweetness and an earthy note to the seasoning profile. It harmonizes well with other spices, adding depth to the overall flavor.
Infuse Flavors into Skin and Meat
To achieve a well-balanced and delicious rotisserie chicken, it’s important to infuse flavors into both the skin and meat. Here are some simple techniques to accomplish this:
- Under the skin: Gently loosen the skin from the meat without removing it entirely. Create a flavorful paste by mixing minced garlic, herbs, salt, pepper, and olive oil. Spread this mixture under the skin, ensuring it reaches all parts of the bird for maximum flavor infusion.
- Inside the cavity: Enhance the taste of your chicken by stuffing aromatic ingredients inside its cavity. Consider using lemon wedges, onion slices, fresh herbs like thyme or rosemary, or even whole garlic cloves.
Master Seasoning Techniques
Mastering seasoning techniques is crucial in creating a delicious rotisserie chicken that leaves everyone craving more. Here are some tips to help you achieve balance and depth in your flavors:
- Taste as you go: Throughout the seasoning process, take small bites or use clean fingers to taste-test your creation. Adjust seasonings accordingly until you achieve a well-rounded flavor profile.
- Don’t overdo it: Be cautious when adding seasonings to your dish, as too much can overpower the other flavors and ruin the balance of the dish. Start with a small amount and gradually add more if needed, ensuring that you maintain a harmonious blend of flavors.
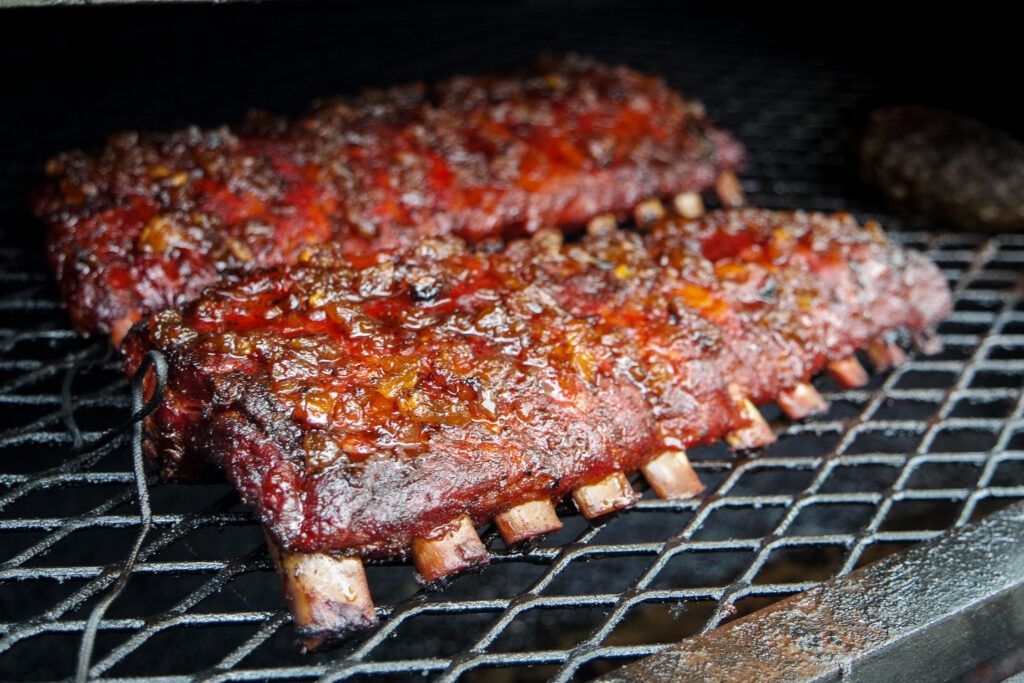
Grilling Techniques for Juicy and Tender Rotisserie Chicken
Grilling rotisserie chicken is a delicious way to enjoy tender meat with crispy skin. With the right techniques, you can achieve a perfect balance of flavors and textures that will leave your taste buds craving more.
Basting for Added Moisture and Flavor
One technique that can greatly enhance the juiciness of your rotisserie chicken is basting. By periodically brushing the chicken with a flavorful liquid during the cooking process, you can infuse it with moisture and enhance its taste. A simple baste made from melted butter, garlic, herbs, and lemon juice can work wonders.
To baste your bird effectively, start by placing it on the rotisserie spit rod and securing it tightly. As the chicken rotates over the grill, use a brush or sprayer to apply the basting liquid evenly across its surface. This method ensures that every bite is infused with flavor while keeping the meat moist throughout.
Rotating Spit Rod or Two-Zone Grilling Setup
Rotating the spit rod is another technique that helps to cook rotisserie chicken evenly while ensuring crispy skin. The constant rotation allows heat to distribute uniformly around the bird, preventing any one side from becoming overcooked or undercooked.
Alternatively, you can opt for a two-zone grilling setup. This involves creating two different heat zones on your grill: one direct heat zone for searing and crisping up the skin, and one indirect heat zone for slower cooking of the meat. Start by searing both sides of the chicken over high heat in the direct zone before moving it to the indirect zone to finish cooking.
Resting Your Cooked Chicken
Mastering the art of resting your cooked chicken is crucial in allowing juices to redistribute before carving. Resting helps to retain the moisture in the meat, resulting in a more tender and flavorful final product.
After grilling your rotisserie chicken to perfection, remove it from the heat and let it rest for about 10-15 minutes before carving. This resting period allows the juices to settle back into the meat fibers, ensuring a moist and succulent bite every time.
Creative Recipes and Ideas for Leftover Rotisserie Chicken
Utilizing Leftover Rotisserie Chicken in Various Dishes
Leftover rotisserie chicken can be a versatile ingredient that adds flavor and convenience to a variety of dishes. Instead of letting it go to waste, why not find creative ways to incorporate it into your meals? With a little inspiration, you can transform your cooked chicken into delightful recipes that will impress your family and friends.
Recipes for Salads, Sandwiches, Soups, and More
The possibilities are endless. Here are some recipe ideas to get you started:
- Chicken Salad: Dice the cooked chicken and mix it with mayonnaise, celery, grapes, and walnuts for a refreshing salad.
- Chicken Sandwich: Shred the chicken and layer it on bread with lettuce, tomato, and your favorite condiments for a delicious sandwich.
- Chicken Tacos: Warm up the shredded chicken with some taco seasoning and serve it in tortillas with salsa, cheese, and avocado.
- Chicken Noodle Soup: Simmer the leftover chicken bones in water with vegetables to make a flavorful broth. Add noodles and shredded chicken for a comforting soup.
These are just a few examples of how you can incorporate leftover rotisserie chicken into different dishes. Let your creativity run wild as you experiment with flavors and textures.
Properly Storing and Reheating Leftover Chicken
To maintain the quality of your leftover rotisserie chicken, proper storage is crucial. Follow these tips:
- Refrigeration: Store the cooked chicken in an airtight container or wrap it tightly in foil or plastic wrap before placing it in the refrigerator.
- Freezing: If you don’t plan on using the leftovers immediately, freeze them in freezer-safe bags or containers for future use.
- Reheating: When reheating the chicken, make sure it reaches an internal temperature of 165°F (74°C) to ensure it is safe to eat.
By storing and reheating your leftover chicken properly, you can enjoy its deliciousness even days after it was initially cooked.
Repurposing Bones and Scraps for Flavorful Stocks
Don’t let the bones and scraps from your rotisserie chicken go to waste! Instead, repurpose them to create flavorful stocks that can be used as a base for soups, stews, and sauces. Here’s how:
- Simmering: Place the chicken bones and scraps in a pot with water, onions, carrots, celery, and herbs. Simmer for several hours to extract maximum flavor.
- Straining: Once the stock has simmered, strain out the solids using a fine-mesh sieve or cheesecloth.
- Storing: Store the homemade stock in containers or freeze it in ice cube trays for easy portioning.
By making your own stock from leftover rotisserie chicken bones and scraps, you’ll elevate the taste of your dishes to new heights.
Conclusion: Mastering the Art of Cooking Perfect Rotisserie Chicken
Congratulations! You are now equipped with the knowledge and skills to cook perfect rotisserie chicken at home. By following the thermal tips, grilling techniques, and essential seasoning tips outlined in this guide, you can achieve juicy, tender, and flavorful results every time.
Cooking rotisserie chicken doesn’t have to be a hassle. With the step-by-step guide provided here, you can easily navigate through the process and impress your friends and family with your culinary prowess. Whether you choose to cook on a grill or in an oven, these methods will ensure that your rotisserie chicken turns out deliciously moist and succulent.
Don’t forget about the creative recipes and ideas for using leftover rotisserie chicken. From salads to sandwiches to casseroles, there are endless possibilities for repurposing this versatile ingredient. So instead of letting any leftovers go to waste, get inspired and experiment with new dishes that will keep everyone coming back for more.
Remember that seasoning is key. By utilizing the right combination of herbs, spices, marinades, or rubs, you can elevate the taste profile of your dish. Feel free to explore different flavor profiles based on personal preferences or cultural influences.
Now that you have mastered the art of cooking perfect rotisserie chicken at home, it’s time to put your skills into action. Gather your ingredients, fire up the grill or preheat the oven, and get ready for a mouthwatering feast that will leave everyone craving more.
So what are you waiting for? Get started on your next rotisserie chicken adventure today!
FAQs
How long does it take to cook a whole rotisserie chicken?
The cooking time varies depending on factors such as size of the chicken and cooking method used. As a general guideline, a whole rotisserie chicken typically takes about 1.5 to 2 hours to cook thoroughly.
Can I use a rotisserie attachment on my grill?
Yes, using a rotisserie attachment on your grill is a fantastic way to achieve that perfect rotisserie chicken. Just make sure to follow the manufacturer’s instructions and adjust the cooking time accordingly.
What internal temperature should the chicken reach when cooked?
The internal temperature of the chicken should reach at least 165°F (74°C) for safe consumption. Use a meat thermometer to check the temperature by inserting it into the thickest part of the thigh without touching bone.
Can I marinate the chicken before cooking?
Absolutely! Marinating the chicken before cooking can add extra flavor and moisture. It is recommended to marinate for at least 2 hours or overnight in the refrigerator for best results.
How long can I store leftover rotisserie chicken?
Leftover rotisserie chicken can be stored in an airtight container in the refrigerator for up to 4 days. If you want to extend its shelf life, you can also freeze it for up to 3 months.
Are there any alternative seasoning options for rotisserie chicken?
Yes, there are plenty of alternative seasoning options available depending on your taste preferences. Some popular choices include lemon pepper, Cajun spice, barbecue rubs, or even exotic spice blends like za’atar or jerk seasoning.
Can I use boneless skinless chicken breasts instead of whole chickens?
Absolutely! While whole chickens are traditional for rotisserie cooking, boneless skinless chicken breasts can also be used. Just remember that they will cook faster than whole chickens, so adjust your cooking time accordingly.
Can I use a slow cooker instead of grilling or oven-roasting?
Yes, using a slow cooker is another option for cooking rotisserie chicken. However, keep in mind that the texture and flavor will be different compared to grilling or oven-roasting. Slow cookers tend to produce more tender and moist chicken.
What are some popular side dishes to serve with rotisserie chicken?
Some popular side dishes to serve with rotisserie chicken include mashed potatoes, roasted vegetables, coleslaw, and garlic bread. These sides complement the flavorful and juicy chicken, creating a delicious and satisfying meal.
0 Comments